This post is also available in:
![]() 日本語 (Japanese)
日本語 (Japanese)
Classical guitar strings have a limited life span and need to be replaced regularly. You may know how to change the strings, but you may be self-conscious about it, or you may ask a store to do it for you every time. This article will explain how to change strings for better sound and faster stability.
The following article summarizes the classical guitar string-related articles on this site.
Remove the strings
The first thing to do is to remove the old strings. To do this, loosen the strings by turning the pegs (windings).
Turn the peg in the direction of the reverse screw.
It is important to note that Turn the peg in the direction of the reverse screw. The direction of rotation of the peg is the opposite thread.
If you are using a screw, turn it clockwise to tighten and counterclockwise to loosen, but the opposite is true for a peg. Turn clockwise to loosen, counterclockwise to tighten. The opposite is true for pegs.
I don’t know how it happened, but it seems to be this way.
It is convenient to use the attaching surface on the electric screwdriver.
When loosening pegs, you need to turn the pegs quite a few times. For this reason, it is useful to use an attachment that attaches to the end of an electric screwdriver. See the following article for more information:

Use it like this:
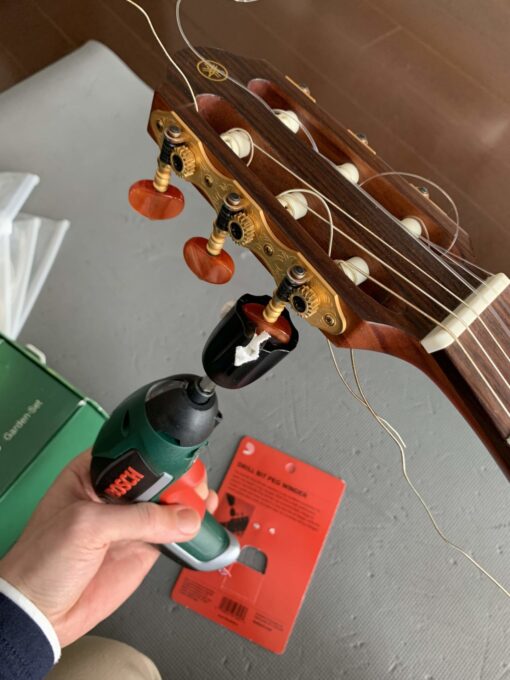
When it is loose enough, remove the strings from the windings.
By the way, I’m basically using a silent guitar as an example because it’s easier to get an image, but the method is the same for a regular classical guitar.
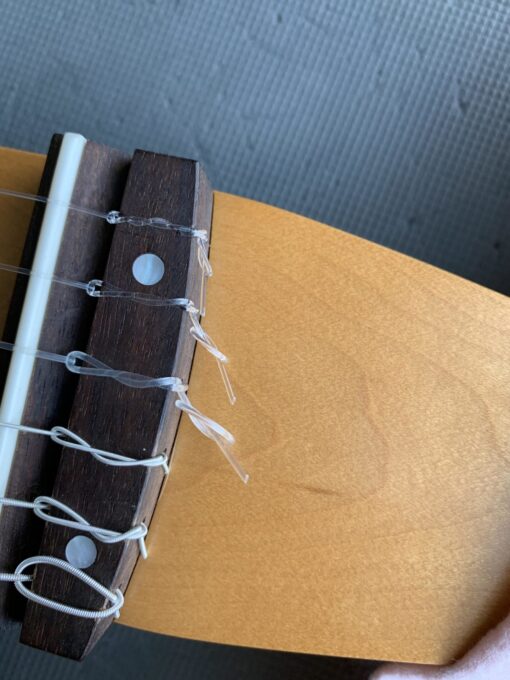
Remove from bridge
Turn the pegs to loosen them, and when the strings are off the windings, remove them from the bridge.
Loosen and remove the ties by inserting a little string into the hole.
You’ll need to clean the fingerboard.
You should take this opportunity to clean the fingerboard.
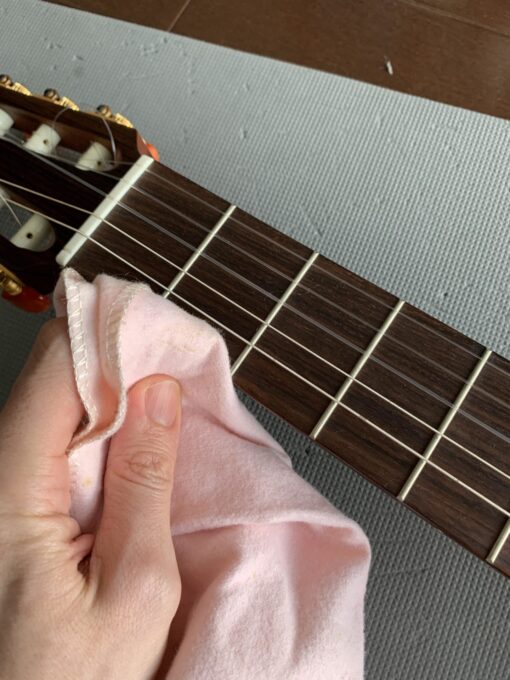
It’s hard to clean your guitar when the strings are still attached, so it’s a good idea to clean them when you remember. You can also use lemon oil to moisturize and kill two birds with one stone:

Should I not remove all the strings at once?
It is said that when removing the strings, it is best not to remove all of them at once. Classical guitars are stable under a load of strings, so it is said that removing all the strings can be harmful.
However, you will have to take it off when you polish the frets or do maintenance. Personally, I don’t think you need to be so nervous about it. It’s a good idea to leave it off. If you leave it off for an hour or two, it’s probably not a problem.
By the way, I start by removing two strings, then one string, then one string, then one string, and so on. This is because it is easier to clean the fingerboard if two are removed.
Putting on new strings
After removing the old strings, put on the new ones.
Pay attention to the direction of the strings.
The first thing to note is the direction of the strings.
bass string
This is especially the case with bass strings, which are sometimes wound loosely at one end and more finely at the other:
Here is the The fine winding should be tied to the bridge side. The looser the winding, the easier it is to tie to the bridge. The looser the winding, the easier it looks to tie to the bridge. Loose windings are from the beginning of the winding process when the string was manufactured and should not be used. The looser the winding, the easier it is to tie to the bridge.
In addition to the fineness of the rolls, there may be some color on them, but this is also an edge from manufacturing and should not be used.
If the fineness is the same on both sides, either is fine. Perhaps it is the middle, not the edge, when manufactured.
treble clef
In the case of treble strings, the colored end is the manufactured end. For this reason, the The uncolored end is used for the bridge. For treble strings, the colored end is the manufactured end.
Some people say that it is easier to tell which string you are wearing if you leave the colored one on the bridge, but it is better to leave the package of strings in the guitar case.
If you put the colored part on the bridge, it may cause the bridge to be colored.
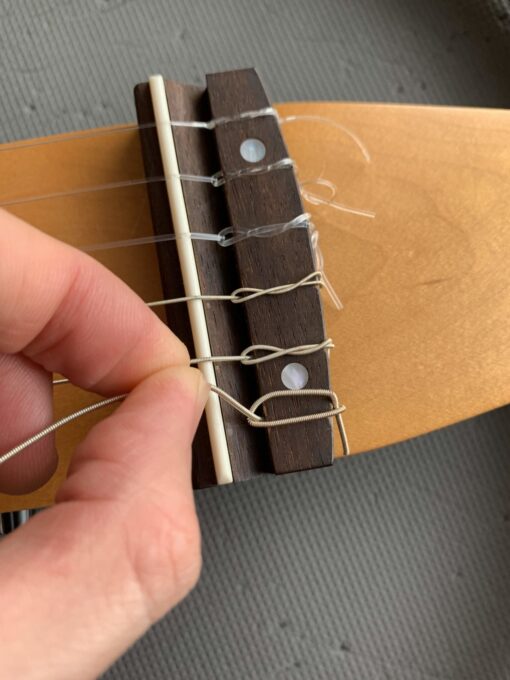
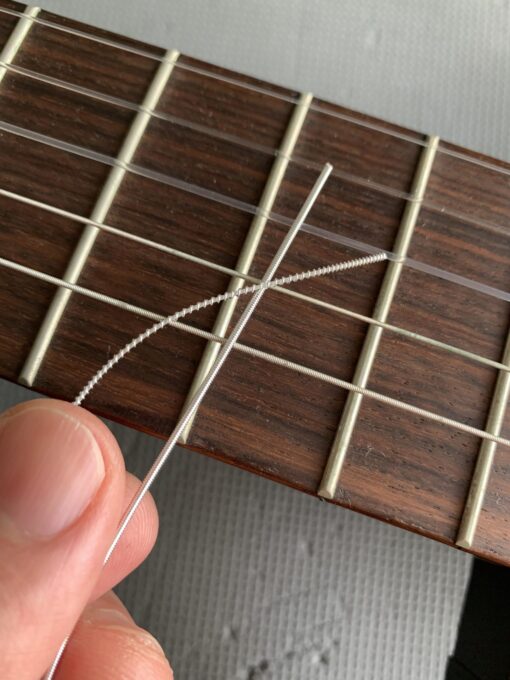
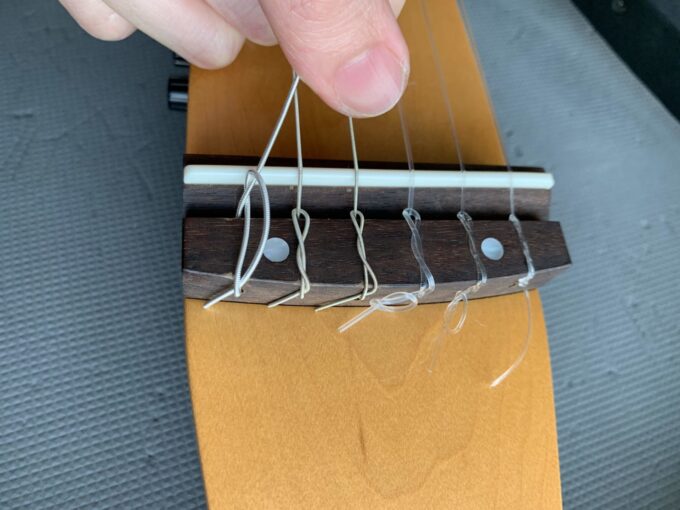
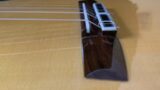
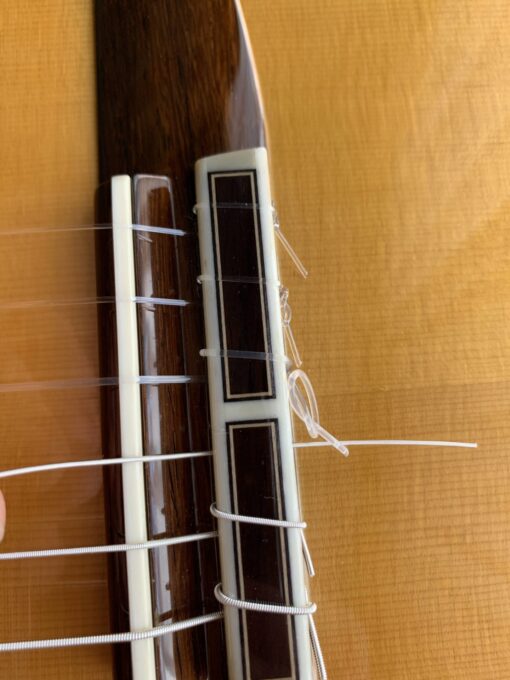
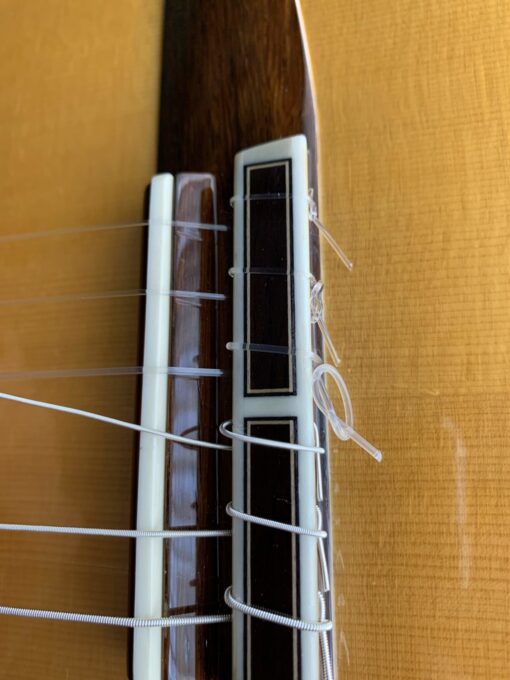
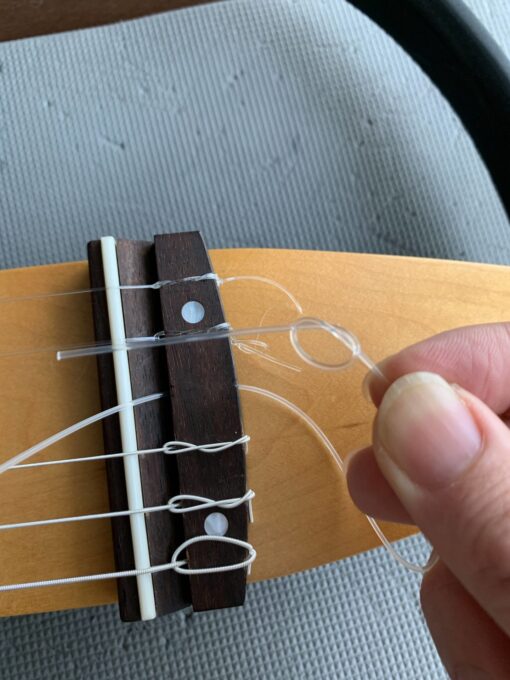
Tie it to the bridge (video available)
Now, let’s actually put the strings on. First, tie the strings to the bridge side.

Thread the strings through the holes first. It is easier to thread the strings from the head side. Next, put the strings back in.
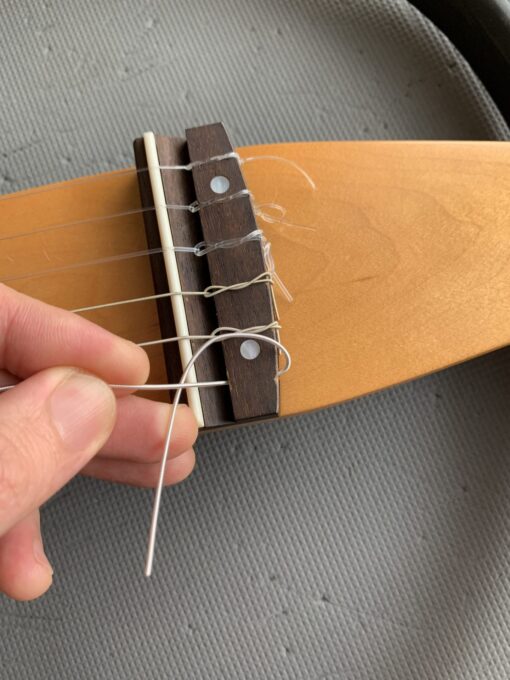
The strings are then secured by tying them to the strings.
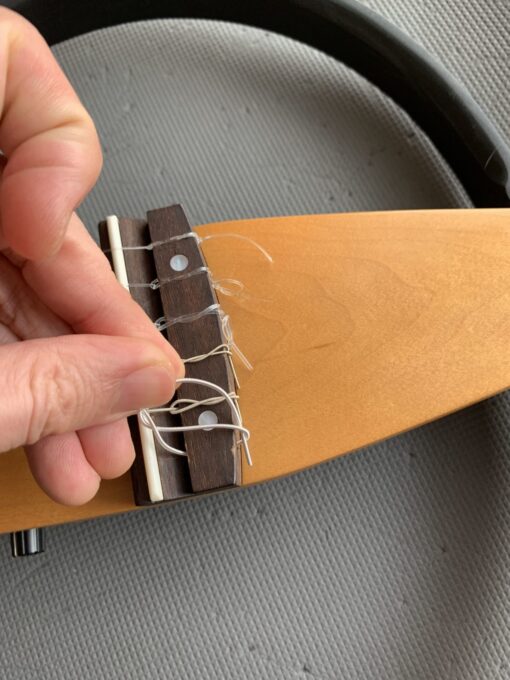
Fix the ends to the sides of the bridge:
It’s hard to understand with text and still images, so please watch this video:
The key point is the last part, where you secure the end of the string to the bridge with the side. If you don’t do this, the strings will fall out easily. Also, tie the strings together only once for the 6th string, but increase the number of times as the strings get thinner. As the strings get thinner, you need to increase the number of times you tie the strings, to increase the friction and make it harder for the strings to fall off. In my case, for nylon strings, I use
- 1 string: 3 times
- 2-5 strings: 2 times
- 6-string: 1 time
I’m working on it:
In the case of carbon strings, the second string should also be played three times because it is thinner.
Here is a video of tying multiple times (5 string example):
How to Tie a Double Hole to a Bridge
The above method is for a single-hole bridge, which has only one hole per string, but it is slightly different for a double-hole bridge.
For more information about double holes, please see this article:
The first step is to thread the strings through the bridge:
Then, instead of tying the string to the string, thread the string through the other hole:
Then thread the string through the hole you started with, and you’re done.
It’s easier than single holes because you don’t have to tie the strings together.
For treble strings, tie a knot.
For treble strings, since they are slippery and easy to pull out, tie a knot in the end of the string.
This knot will hold the knot even if it is about to come loose:

It is recommended to do this for all the treble strings, because even the thickest three strings can fall out. If you make the strings too long, you may not have enough length when they are pulled, so it is better to make them long when you put them on and cut them later.
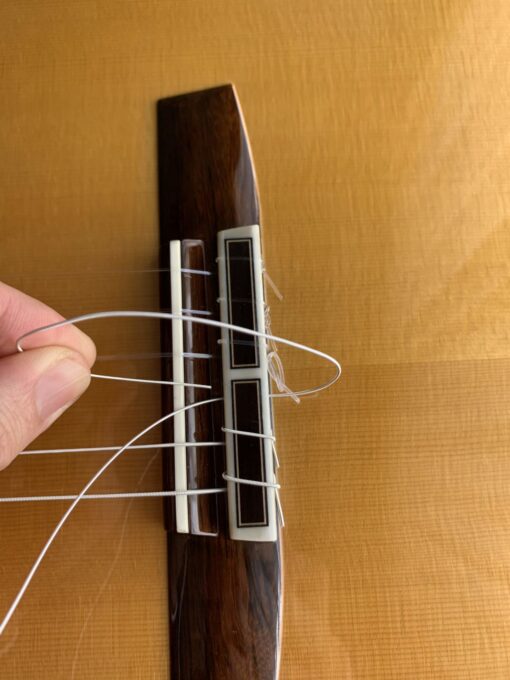
Attaching the string to the spool (video available)
After attaching the strings to the bridge, attach the other side to the string winder.
First, thread the string through the hole in the spool.
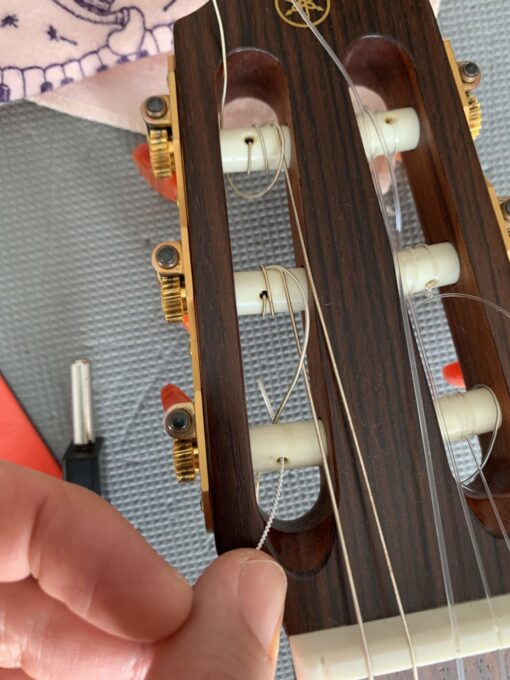
Then put the string back and thread it between the nut and the head.
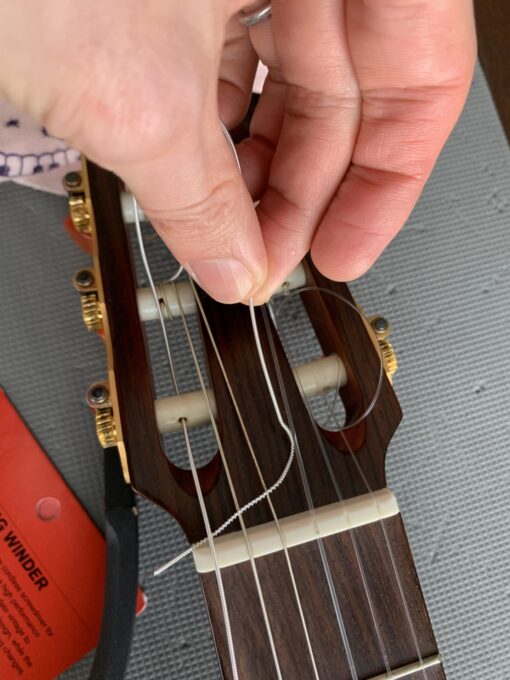
Repeat this again, and when you have tied the knot twice, pull to tension the string.
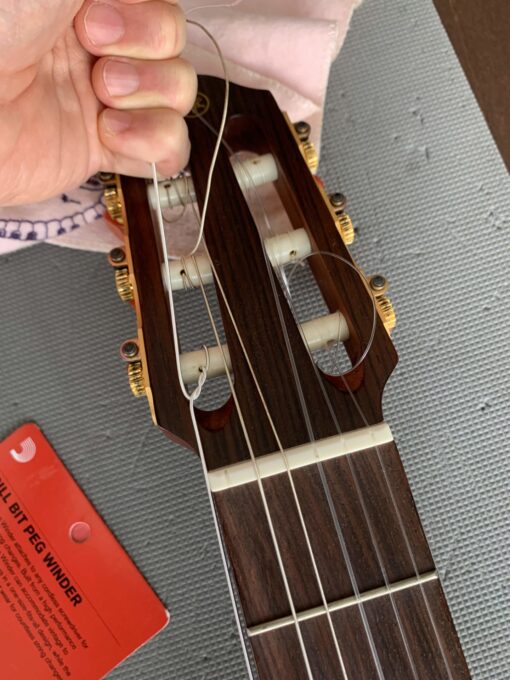
While pulling, turn the peg in a semi-clockwise direction to complete the job. Again, as I mentioned above, an attachment to an electric screwdriver makes this easier. Please note that if you don’t do this while checking the sound with a tuner, you may cut the pegs due to over-tensioning.
This is also hard to do with text and still images, so I prepared a video.
Pay attention to the direction of the strings.
One thing to keep in mind is the direction of the strings. In the picture above, the strings are passed from inside to outside. You need to change the direction depending on the string. In the picture above, the strings are passed from inside to outside.
- 1st and 6th strings: inside to outside
- Strings 2-5: outside to inside
The reason for this is because of the direction in which the string is wound relative to the hole in the winding.
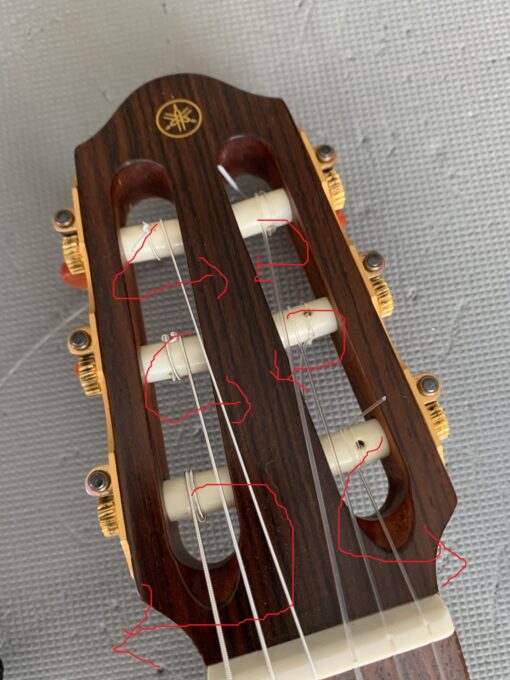
The photo above shows the finished version of the head. If you look at the first and sixth strings, you will see that the strings are wound outward from the hole. In the photo above is the finished version of the head. In contrast, the 2nd to 5th strings are inside the hole. This is determined by the position of the string winder hole and the strings, and should be the same every time. The purpose of reversing this direction and the position of the knot is to achieve balance. It should be the same every time.
For example, if you make the first and sixth strings from outside to inside, the knot that secures the string to the winding and the position where the string is wound will both be outside the hole. By making the strings from inside to outside, the knot is inside and the windings are outside, creating a balance.
Note that the relationship between the hole and the roll may be reversed on some guitars. If this is the case, please adjust accordingly.
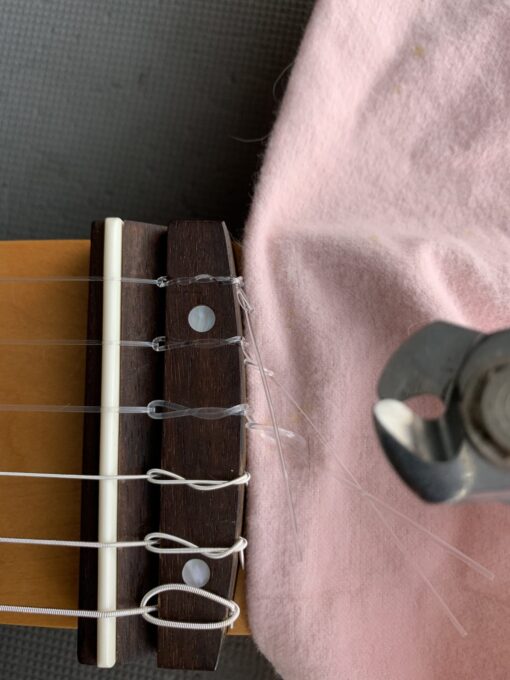
Cut the excess string.
Now you can hear the sound, but I think there are some strings left on the head or bridge side.
If there is any excess, it may stick somewhere, or it may resonate with the sound and make noise, so cutting it is recommended.
Do not use scissors or nail clippers at this time:
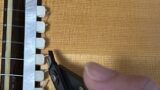
As mentioned in the article above, it is recommended to use something that can cut metal.
When cutting the bridge side, it is safer to place a cloth between the string and the surface plate.
How to choose new strings
For more information on how to choose new strings, please refer to this content.
Changing strings is easy, but there are many tricks.
As you can see, changing strings on a classical guitar may seem simple, but there are actually a few tricks. It is said that if you follow these tips, the sound will be better and the stability will be faster.
It’s a new string, so let’s make sure it’s in tip-top shape.